Friday, January 30, 2009

Interior Restore - Part 6 - Floor Pan Prep

The rocker panels, frame rails, torque boxes, etc, basically everwhere the floor pan attaches to or covers, was sanded, treated with picklex 20 rust converter and painted with Zero rust paint.

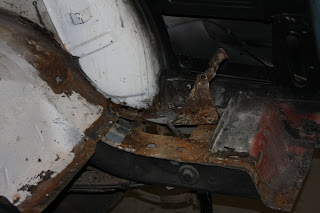
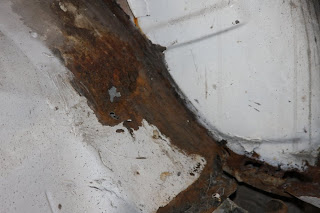
Here is what it looked like before.  You can see all the old paint, primer, and some surface rust:


Notice the two tone paint job! :-).  On the rockers, I will use weld through primer on the lower part.  The top part of the paint will be masked off and the bottom sprayed with weld through primer.  The paint line represents where the floor pan originally was which will help when putting the new one back in and getting it fitting right.


Matt getting jiggy with the DA on the bottom of the floor pan. Getting it all scuffed up and ready for 3 coats of Zero Rust. I asked him which he liked better, block sanding the roof or sanding on the floor pan. He said the floor pan was alot easier.


Interior Restore - Part 5 - Dash Paint/Repair

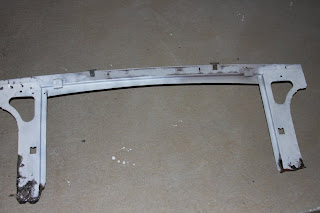
The dash on a 65-66 is actually part of the frame.  The front windshield reveal is part of the dash.  The cowl is spot welded to this area from the factory.  The previous owner of the car removed the cowl by dilling out all the spot weld instead of using a spot weld cutter.  I welded up all the holes while matt used held a copper backer in place.

Here you can see the dash / windshield reveal area with all the holes:

Holes welded up:


Welds ground smooth and painted with Zero Rust Paint:

The dash had quite of bit of surface rust.  No pitting or rotted out areas. 


 We sanded it down good with 150 and 220 grit paper.  Treated it with picklex-20 rust converter.  Then sand and scuffed with Zero Rust.  Black zero rust leaves smooth satin finish.  Should look good on the interior as a finished product.


Wednesday, January 28, 2009

Interior Restore - Part 4 - Final Cutout

I am begining to wonder if this is a father and son project, or just a father project.  Spent a little time tonight (Wednesday Night) getting the remainder of the floor pan out and Matt wasn't interested in helping.  The new one piece floor pan from NPD includes new torque box covers.  The old ones were in decent shape, but had some minor rust on the lower edges, So I went ahead and cut them out.  What a PITA... These things were like 8 or 10 gauge, so drilling out the spot welds took alot of work.  Probably spent one hour one each side getting them out.  Click to enlarge each pic

So how many tools does it take to cut out a floor?

Drilling spot welds and using an air chisel to peal away the remaining floor pan


I had already planned to widen the wheel tubs (inner housings) to help make room for the 18X9.5's, but after getting all the floor out, I am also going to put a full trunk pan in the car.  You can see the rust has gotten down into the seam between the wheel housing and the transition area trunk pan.


Passenger side torque box cover drilled out and cut.


Top removed, and guess what has been living here?  Hmm...  Good thing we have the feline fabricator.

Here is what the new torque box covers look like mocked up.

Pile of mangled up floor pan sheetmetal

Finally, every last bit of the floor pan has been removed.  Got to do some work prepping the frame rail extensions, rocker panels, etc for welding in the new pan.


New Floor Pan Ready to go in.... more to come soon...


Sunday, January 18, 2009

Interior Restore - Part 3 - Roof Paint

Today we continued the interior restoration. The inside of the roof was sanded/scuffed thoroughly. Old factor seam seeler was heated up and scraped off. heavily rusted areas were treated with Picklex 20 Rust Converter prior to painting. Most of the rusted color you see on the roof is not rust, it is the factory red oxide primer. The interior is being painted with Black Zero Rust Coating. Zero rust creats an air tight moisture barrier which helps to control corrosion and Rust. I sprayed most of it with the HVLP gun mixed at 15%, while hard to reach areas were sprayed with the small pre-val gun mixed at 10%.  Click to enlage pics


The package tray was rusted where it was spot welded to the floor and on the passenger side sail panel mounting point. It had to come out anyway for the mini tubs.


Saturday, January 17, 2009

Interior Restore - Part 2 - Floorpan Cutout


We cut the major sections out on both sides.  We are putting a full floor pan from NPD in the car, so eventually we will cut out the rest of the trans/driveshaft tunnel and will remove the rear sections of the floor pan.  We just wanted to remove the major parts, so we could work on the inner roof and being able to stand up in the car with the floor out and the car up high on jack stands.


Interior Restore - Part 1 - Before

OK, today we started the floor pan replacement and interior work.  We still have to rid the interior of rust, prep, and paint with Zero Rust (Better than POR15).  Before we started, we covered the roof work we previously completed in plastic to protect it.  Below are a few pics of what the floor pan looked like before we started.  The person we had bought the car from attempted a repair by cutting out the rusted areas and cutting some very thick sheetmetal and putting it in place with rivets.  They also fabricated a new seat riser using the same method.  Click pics for larger view


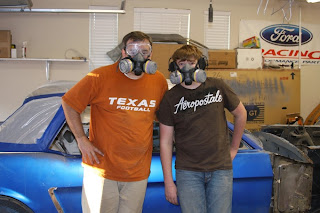
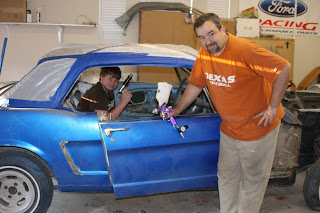
Me and Matt Messing Around

Matt and I jumped out there to day and cut the floor pan out of the car.  A few pics of us with some tools and gear...


A few pics from today's work, ripping out the old floor pan.


Sunday, January 11, 2009

Roof Repair - Part 3 - Epoxy Primer

Well, this has been the worst part of the car and most time consuming. In the future on a job like this, i will definitely just put a whole new roof skin on the car. It has certainly been a learning experience. The roof repair is now complete.

I was real proud of Matt.  He worked hard on this part of the car, block sanding, wire wheeling, preping, and just generally being a big help!


After all the rusted areas were either replaced with new metal or properly rust treated (blasted adn coverted), the roof was sprayed with 2 coats of PPG DP50LF 2 part epoxy primer mixed at 2:1 with the PPG activator. Click images to enlarge

Gravity Feed HVLP Gun with 1.4 Tip, PPG Primer, and Evercoat Rage Extreme. This epoxy primer is meant to be applied to bare metal and filler, and does an exceptional drive of sealing everything from allowing any air or moisture to reach the substrate, so if there happened to be any small amounts of rust left in the pits (doubtful) will not spread any further as rust requires air and/or moisture to spread.